Tag: Marketing automation

  • VBOUT Review 2025: Is This Marketing Automation Platform Worth It?

    VBOUT Review 2025: Is This Marketing Automation Platform Worth It?

    Do you ever feel like you’re running a marketing circus, juggling emails, social posts, and ads with different tools? It’s exhausting. You pour your energy in, but the connection between your efforts feels weak. What if you could bring all those acts under one big top?

    That’s the promise of an all-in-one marketing automation platform. It’s about working smarter, not harder. This analysis explores if one specific software delivers on that promise for your business.

    We’ll cut through the noise. You’ll get a clear look at features, pricing comparisons, and real value. This isn’t about hype. It’s about finding a solution that truly streamlines your work and grows with your ambitions.

    Key Takeaways

    • This analysis provides an objective look at a comprehensive marketing automation platform.
    • Understand how consolidating tools into one dashboard can streamline your workflow.
    • Gain clarity on pricing plans, starting points, and potential savings with annual billing.
    • Learn how the platform is designed to scale with businesses of all sizes.
    • Discover the availability of a free trial to test the software firsthand.
    • See how it compares to other solutions like email marketing platforms.

    Why You Should Consider VBOUT for Your Marketing Automation

    Managing customer relationships across different platforms often leads to fragmented insights and missed opportunities. A unified approach eliminates these gaps, creating a seamless experience for both your team and your audience.

    Unique Selling Points and Benefits

    This platform’s true strength lies in its comprehensive approach. Instead of juggling separate tools, you get email, social media, landing pages, and analytics in one dashboard.

    The powerful analytics deliver actionable insights into audience behavior. You can track engagement patterns and optimize strategies based on real data. This helps maximize return on investment across all channels.

    Lead management tools automatically score prospects based on their engagement. Personalized content sequences move them through your sales funnel efficiently. The integration capabilities create unified customer profiles for more targeted campaigns.

    Target Audience and Ideal Business Size

    This solution scales with your growth, supporting businesses of all sizes. Small companies benefit from the intuitive interface that doesn’t require technical expertise.

    Medium-sized businesses appreciate the flexibility to customize workflows. Large enterprises gain sophisticated segmentation and orchestration capabilities. The platform adapts to your unique customer journey maps and processes.

    If you value consolidated reporting over platform-hopping, this could be your ideal fit. It’s particularly valuable for those seeking comprehensive multi-channel marketing automation rather than specialized point solutions.

    vbout review 2025: Key Features and Functionality

    What separates a good marketing platform from a great one is how its features work together, not just individually. The core tools need to create a seamless workflow that saves time while delivering better results.
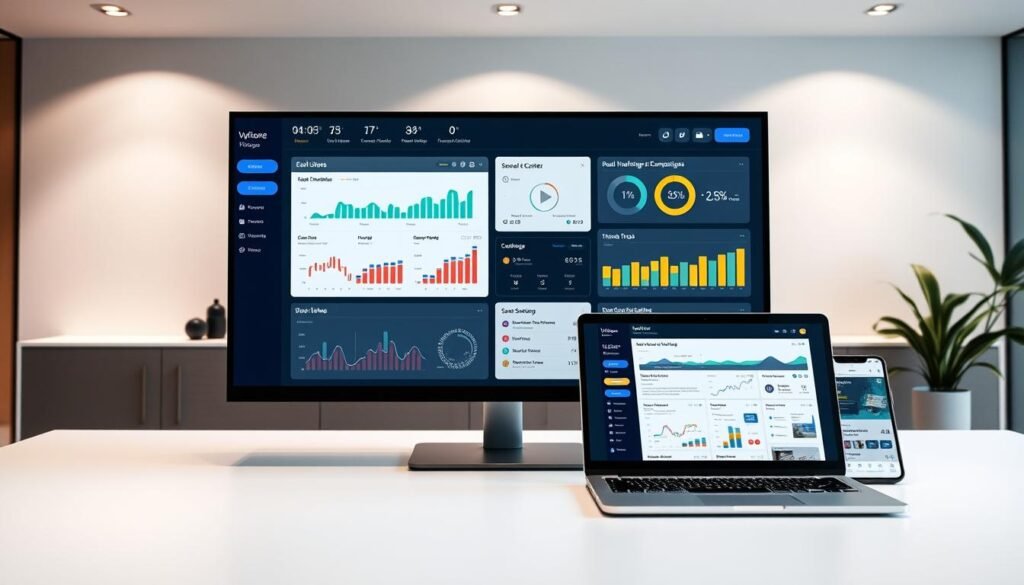
    A sleek and modern email marketing campaign management dashboard, featuring a clean and intuitive user interface. In the foreground, a large monitor displays real-time data and analytics, with colorful charts and graphs highlighting key performance metrics. In the middle ground, a laptop and mobile device showcase the responsive and cross-platform design, allowing users to seamlessly manage their campaigns on the go. The background is a minimalist, office-like setting, with muted colors and clean lines, creating a professional and efficient atmosphere. Soft, directional lighting illuminates the scene, emphasizing the dashboard's clarity and attention to detail. The overall mood is one of productivity, control, and data-driven decision-making, perfectly suited for the "vbout review 2025: Key Features and Functionality" section.

    Email Marketing, Drip, and Campaign Management

    Your email marketing becomes more powerful with visual editors and mobile-optimized templates. The system maintains brand consistency while speeding up deployment.

    Drip campaigns automatically personalize content based on subscriber behavior. Dynamic content ensures each contact receives relevant messaging throughout their journey. This approach increases engagement and conversions significantly.

    Sophisticated campaign management includes A/B testing and detailed analytics. You can scientifically determine which content variations perform best. For deeper insights, explore our guide to email marketing best practices.

    Social Media Management and Engagement

    Centralized social media management lets you schedule posts across multiple networks. You can monitor brand mentions and track engagement metrics in one place.

    Social promotion efforts feed valuable data back into customer profiles. This enables more informed segmentation for follow-up campaigns. Learn more about effective social media management strategies.

    Landing Pages, Web Forms, and List Management

    Create high-converting landing pages and web forms using drag-and-drop builders. No coding knowledge is required for complete design control.

    Your list management becomes more targeted with sophisticated segmentation options. Contacts are automatically added to appropriate lists based on their behavior. Discover advanced landing page optimization techniques to maximize conversions.

    The platform tracks all interactions, giving you complete visibility into which campaigns generate the best leads. This integrated approach ensures all your marketing efforts work together seamlessly.

    Comprehensive Pricing and Plans at a Glance

    Your budget allocation for marketing tools should reflect both immediate needs and long-term growth potential. Understanding the pricing structure helps you make informed decisions about which platform delivers the best value.

    Subscription Models and Free Trial Options

    The Professional plan starts at $100 monthly, with annual billing reducing this to $90. This represents a 10% savings that adds up over time.

    You should definitely take advantage of the free trial before committing. This trial free version lets you test all features hands-on. It ensures the software meets your specific business requirements.

    A striking, minimalist comparison of marketing automation pricing plans, shot in a modern, clean style. In the foreground, a sleek, high-contrast table displays the key features and costs of various providers, inviting the viewer to evaluate the options. The middle ground showcases subtle, geometric shapes and gradients, creating a sense of depth and balance. The background features a muted, monochromatic palette, allowing the pricing information to take center stage. Soft, directional lighting casts gentle shadows, lending a sense of depth and sophistication to the scene. The overall composition is designed to highlight the essential details while maintaining a visually engaging, professional aesthetic.

    Cost Comparison with Competing Platforms

    When you read reviews and compare pricing, you’ll see how this platform stacks up against alternatives. Our pricing strategies guide can help with deeper analysis.

    PlatformStarting PriceUser RatingKey Differentiator
    VBOUT$100/month4.6/5All-in-one suite
    HubSpot Marketing Hub$50/month4.6/5CRM integration
    EngageBay$14.99/month4.6/5Budget-friendly entry
    GetResponse$19/month4.6/5Email-focused
    Marketing 360Custom4.4/5Agency services

    Use our ROI calculator to determine your ideal marketing budget. The total cost of ownership over 12-36 months often reveals the true value.

    In-Depth Look at User Experience and Support

    Beyond feature lists and pricing, the daily interaction with your marketing tools determines long-term success. A platform’s true value emerges when your team can navigate it effortlessly and get help when needed.

    Intuitive User Interface and Customizable Templates

    You’ll appreciate the logical navigation and drag-and-drop functionality. The interface minimizes learning curves typically associated with comprehensive marketing automation.

    Customizable templates span email campaigns, landing pages, and web forms. They maintain brand consistency while reducing creation time. This ease of use makes advanced features accessible.

    When you read reviews, pay attention to template flexibility. Users often highlight the WYSIWYG editor and branding options.

    Customer Service, Support, and Community Feedback

    Your support experience becomes critical during technical issues or strategic guidance. Response times and expertise level matter for uninterrupted operations.

    Investigate the company’s customer service reputation through multiple sources. Look for consistency in handling technical problems and feature requests.

    Support FeatureAvailabilityUser Rating
    Live ChatBusiness Hours4.5/5
    Knowledge Base24/74.7/5
    Community ForumsAlways Active4.3/5
    Video TutorialsOn-Demand4.6/5

    Explore our guide to customer support benchmarks for deeper analysis. Real user testimonials provide valuable insights into day-to-day platform management.

    Integrations, Analytics, and Advanced Marketing Tools

    The true power of any marketing platform emerges when it connects seamlessly with your existing tools and provides clear performance insights. This synergy between integration and analytics transforms scattered data into actionable intelligence.
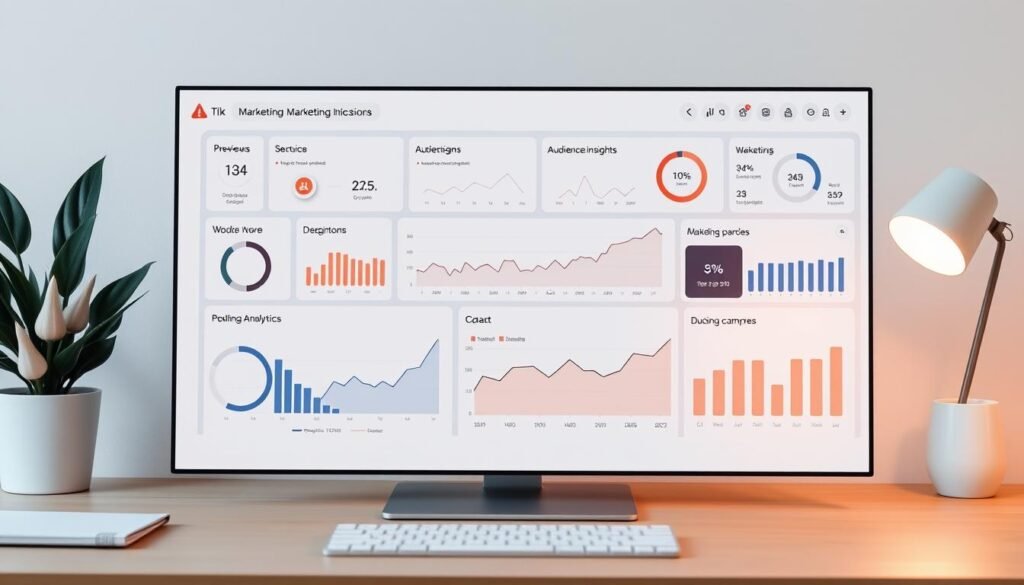
    A sleek, modern marketing analytics dashboard integrated seamlessly into a digital workspace. Crisp data visualizations and intuitive metrics panels presented against a muted, sophisticated color palette. Clean lines, minimalist iconography, and subtle hover effects convey a sense of sophisticated functionality. Dynamic charts and graphs showcase key performance indicators, audience insights, and campaign analytics in real-time. Warm, directional lighting accentuates the dashboard's elegant design, creating depth and dimension. The overall aesthetic is one of streamlined efficiency, empowering marketing professionals to make informed, data-driven decisions.

    Third-Party Integrations and API Capabilities

    Your integration strategy becomes more effective with pre-built connections to CRM systems, e-commerce platforms, and webinar software. These links create unified data flows across your entire technology stack.

    API capabilities allow custom connections with specialized software. Your development team can create tailored synchronization workflows. This flexibility supports unique business processes and requirements.

    When sales and marketing systems share data, your teams access complete interaction histories. This alignment leads to more personalized conversations and higher close rates. Learn more about building an effective marketing technology stack.

    Real-Time Analytics and Reporting Features

    You gain immediate visibility through real-time analytics that track campaign performance and visitor behavior. This enables rapid adjustments to underperforming campaigns.

    Behavior analytics monitor how contacts interact with your content across channels. The system builds detailed customer journey maps revealing the most effective touchpoints.

    Your lead management improves with automated scoring that prioritizes prospects showing strong buying signals. Visual dashboards transform complex data into intuitive charts for easy interpretation. Explore our guide to analytics interpretation for deeper insights.

    Conclusion

    Your final decision on a marketing platform should align with both current operational needs and future growth trajectories. This comprehensive marketing automation solution consolidates essential tools into one unified dashboard.

    The platform’s true value emerges when you leverage its full capabilities across email, social media, and analytics. Your team’s strategic execution ultimately determines success with any marketing software.

    Take the next step in your evaluation process. Learn about successful automation implementation or explore migration strategies for seamless transition.

    Ready to test the platform? Schedule a consultation or use our ROI calculator to determine your ideal marketing investment.

    FAQ

    What is the main advantage of using VBOUT over separate tools?

    The primary benefit is having an all-in-one marketing automation platform. You can manage your email marketing, social media scheduling, lead tracking, and landing page creation from a single dashboard. This integration saves you time and provides a unified view of your customer engagement.

    Is VBOUT suitable for a small business or a solo entrepreneur?

    Yes, it is an excellent fit. The platform is designed to scale with your business. Its pricing plans are accessible for smaller operations, and the user-friendly interface makes it easy to launch professional campaigns without a large team or a big budget.

    How does the automation feature work for email and social media?

    Automation allows you to set up drip campaigns that send emails based on user actions. You can also schedule and automate your social media posts across different networks. This dynamic content delivery helps you nurture leads and maintain consistent engagement without manual effort.

    Can I track the performance of my marketing efforts with this software?

    Absolutely. VBOUT provides robust analytics and reporting features. You get real-time insights into your email open rates, social media engagement, website traffic from landing pages, and overall sales funnel performance. These reports help you understand what strategies are working.

    What kind of customer support can I expect?

    Support includes email assistance, a comprehensive knowledge base, and video tutorials. User reviews often highlight the responsive support team that helps troubleshoot issues and provides guidance on using the platform’s advanced tools effectively.

    Is there a way to test the platform before committing?

    Yes, a free trial version is available. This allows you to explore the key features, such as building web forms, creating campaigns, and managing your contact list, to see if the platform meets your specific marketing needs before purchasing a subscription.
  • Customer.io Tutorial 2025: Set Up Your First Automation in 30 Minutes

    Customer.io Tutorial 2025: Set Up Your First Automation in 30 Minutes

    Ever feel like powerful marketing tools are just too complex to tackle? You know they can transform your business, but the sheer number of features can be intimidating. That initial excitement quickly fades into hesitation. What if you could cut through the noise and see a real result today?

    This guide is designed for that exact moment. We focus on the fastest path to success. You will get your first automation running in about half an hour. We will ignore the advanced options for now and concentrate on what truly matters to get started.

    The platform helps you by providing a Setup List on your dashboard. Think of it as a helpful checklist, not a strict requirement. You do not need to finish every item to begin seeing value. The core steps are simple: create your workspace, set up a way to send messages, add someone to your audience, and launch a campaign.

    This tutorial takes a hands-on approach. You will add yourself as a test contact and send a real message. This immediate, practical experience shows you how the system uses data to personalize communication. It’s the quickest way to build confidence and understand the potential.

    Key Takeaways

    • You can achieve a working automation quickly by following a focused path.
    • The platform’s Setup List is a guide, not a mandatory pre-launch checklist.
    • Four essential steps form the foundation for any automation project.
    • This guide uses a practical method, having you send a real message to yourself.
    • You will learn how data drives personalization from your very first campaign.
    • The default settings are powerful enough for most initial needs.

    Getting Started with Your Customer.io Account and Workspace

    Setting up your marketing automation foundation requires just two initial components: an account and a workspace. This initial step is designed to be straightforward, getting you to the powerful features quickly.

    Creating Your Account and Workspace

    Begin by visiting the platform’s website to create your account. You’ll select a plan that matches your needs, with a free trial available for evaluation.

    The registration process asks for basic company information and your intended use cases. This helps tailor the onboarding experience to your specific requirements.

    Immediately after account creation, you’ll establish your first workspace. Think of this as your dedicated container for people, data, campaigns, and settings.

    Understanding Default Settings and Initial Setup

    Your dashboard will display a setup checklist guiding you through essential configuration tasks. This flexible process lets you complete items in any order that suits your workflow.

    The platform uses default settings that support most use cases immediately. These provide a solid foundation without requiring deep technical knowledge.

    “The default configurations are optimized for rapid deployment while maintaining flexibility for future customization.”

    Account verification is an important step to understand. While unverified, you can test all features except sending actual messages to your audience.

    Workspace TypeBest ForData Isolation
    Single BrandSmall to medium businessesComplete separation
    Multiple BrandsAgencies or enterprisesNo cross-workspace sharing
    Regional DivisionsInternational companiesIndependent configurations

    Verification requires providing details about your website, subscription methods, and message types. This ensures compliant and effective communication practices from the start.

    Configuring Your Message Channels and Domain Settings

    Establishing reliable message delivery is the critical bridge between your audience data and actual engagement. This configuration ensures your campaigns reach people through their preferred communication methods.

    You begin by selecting which channels to activate. The platform supports multiple options including email, push notifications, and SMS.

    Setting Up Email and Other Messaging Channels

    Email remains the most common starting point for new users. The setup process guides you through essential steps for proper configuration.

    You’ll enter your sending domain and specify From addresses for your campaigns. The system allows multiple addresses for different message types.

    Channel management stays flexible as your strategy grows. You can add new options later through your workspace settings.

    Verifying Your Domain and Enabling Link Tracking

    Domain verification proves ownership and establishes sender legitimacy. This authentication significantly improves email deliverability rates.

    You add specific DNS records to your domain host during this process. Proper setup includes optional link tracking through CNAME records.

    Important consideration: New senders should gradually increase volume to protect domain reputation. Established senders might prefer custom SMTP configuration.

    • Custom SMTP maintains existing domain reputation
    • Provides full control over sending infrastructure
    • Preserves historical metrics and data consistency

    Your website integration begins here too. You’ll prepare to add the tracking snippet to identify visitors and their behavior.

    Adding Test Users and Segmenting Your Audience

    Before sending any messages, you need to establish who you’re communicating with through careful audience organization. This process transforms raw contact information into meaningful groups that receive relevant content.

    Adding a Test Person and Defining Attributes

    Start by visiting the People page in your workspace. Click Add People and select Add a Person to create your first test entry. This approach lets you experiment safely without contacting actual users.

    Assign a simple identifier like “1” and use your own email address. Add basic attributes such as first_name and last_name. These details help personalize messages and target specific individuals.

    A well-lit, modern dashboard interface with a clean, minimalist design. In the foreground, a series of interactive data visualizations and segmentation tools, such as bar graphs, pie charts, and demographic filters. The middle ground features a large, central screen displaying a detailed audience breakdown by various metrics like location, activity, and user personas. The background showcases a soft, blurred gradient in soothing shades of blue and gray, creating a professional, high-tech atmosphere. The overall scene conveys a sense of data-driven insights and audience optimization for targeted marketing strategies.

    Each person in the system has three core data types. Identifiers make individuals unique. Attributes represent known characteristics. Events track actions that can trigger campaigns.

    Building Data-Driven and Manual Segments

    Group your people into segments based on shared attributes or behaviors. Data-driven segments update automatically as conditions change. They ensure your campaigns always reach the right audience.

    Manual segments create static lists for specific campaigns. You maintain complete control over who receives each message. Both approaches help you deliver targeted content effectively.

    You can import data via CSV files or integrate forms directly. Each method requires proper identifiers to connect information to the right people. This foundation supports all your future automation efforts.

    Step-by-Step customer.io tutorial for Campaign Creation

    Campaign creation represents the pivotal stage where audience insights become personalized messaging. This process connects your data with automated communication.

    A clean, well-lit home office workspace with a sleek desktop computer, a curved monitor, and a modern desk setup. The screen displays a customer.io campaign workflow creation interface, with various tools and options neatly arranged. In the foreground, a human hand hovers over the mouse, ready to click and configure the automation steps. The middle ground features a minimalist decor with potted plants, a notebook, and a cup of coffee. The background shows a warm, natural lighting from a large window, casting a soft glow on the scene. The overall atmosphere is one of productivity, focus, and attention to detail.

    Designing Your Campaign Trigger and Workflow

    Begin by navigating to Campaigns and selecting Create Campaign. Name your campaign clearly for easy team identification.

    The trigger configuration determines when people enter your workflow. Choose Segment change as your trigger type. This activates when individuals join specific audience groups.

    Create a data-driven segment with attribute conditions. Filter by first_name to ensure only your test user enters this campaign.

    Personalizing Your Email Content with Liquid Syntax

    Drag an Email action onto your workflow canvas. Select your preferred editor based on design needs.

    Configure essential settings including your From address and subject line. Use liquid syntax like {{customer.first_name}} for dynamic personalization.

    This syntax references attribute values directly from user profiles. It enables conditional logic and fallback values when attributes are missing.

    Editor TypeBest Use CasePersonalization Features
    Drag-and-DropVisual messagingBasic variable insertion
    Rich TextSimple campaignsFull liquid syntax support
    Code EditorAdvanced customizationComplete template control

    Change Sending Behavior to “Send automatically” instead of “Queue Draft.” This ensures messages deliver immediately when triggers activate.

    Review your settings and launch the campaign. You’ll receive your test email within minutes, demonstrating how workflows personalize communication.

    Integrating In-App Messaging and Other Communication Channels

    Expanding your communication strategy beyond email opens powerful new engagement opportunities. This section guides you through adding in-app messaging, push notifications, and SMS to create a true omnichannel experience.

    A sleek and modern in-app messaging interface, seamlessly integrated into a digital dashboard. The foreground features a clean, minimalist chat window with intuitive controls and message bubbles. In the middle ground, an array of communication channel icons - email, push notifications, SMS - arranged in a grid layout. The background showcases a blurred, out-of-focus view of a productivity app or website, hinting at the broader context of the integration. Soft, even lighting creates a calm, professional atmosphere, while a slightly elevated camera angle provides an inviting, user-centric perspective. The overall aesthetic conveys efficiency, interconnectivity, and a cohesive, omnichannel messaging experience.

    Setting Up In-App Messaging on Your Website or App

    In-app messages deliver content directly within your platform when users are active. They differ from push notifications by requiring current engagement with your site or app.

    You’ll need to install an SDK for this functionality. Website integration involves adding a simple JavaScript snippet to your pages. Mobile apps require platform-specific SDKs for iOS, Android, or cross-platform frameworks.

    The setup begins in your workspace settings. Navigate to Settings > Workspace Settings and enable in-app messaging. The platform provides documentation links for each supported integration method.

    Exploring Push Notifications and SMS Integration

    Push notifications reach users even when they’re not using your app. SMS delivers text messages to mobile devices for high-priority communications.

    Both channels activate through your workspace settings. You’ll follow similar setup processes for each option. These features expand your ability to send messages across multiple touchpoints.

    Channel TypeDelivery TimingUser RequirementBest Use Cases
    In-App MessagingDuring active useMust be on site/appOnboarding, feature guides
    Push NotificationsAny timeApp installedAlerts, reminders, updates
    SMS Text MessagesImmediateMobile numberTransactions, urgent info

    Testing ensures your integration works correctly. Send a test message to verify proper display. The platform adjusts message polling rates after your first successful send.

    Multi-channel integration creates consistent messaging across all platforms. Your audience receives personalized content through their preferred communication methods.

    Conclusion

    With your initial automation now active, you’ve laid the groundwork for scalable customer communication. This guide has walked you through the essential steps to get started quickly with your marketing automation platform.

    The account verification process is your next crucial step before sending messages to real people. Contact technical support with details about your company website and messaging strategy. Once verified, you can begin sending emails and expanding your channels.

    Remember that this quick start demonstrates only the basic features available. To achieve the greatest results, invest time in planning your full implementation strategy. Capture the right data through thoughtful attributes and events.

    Effective marketing automation is an iterative process. Continuously refine your segments and optimize message content based on performance data. Expand your use of the platform’s features as you identify new opportunities.

    FAQ

    What do I need to do before I can start sending messages?

    Before you can send messages, you need to complete your initial setup. This includes creating your workspace, configuring your messaging channels like email, and verifying your domain. You should also add some test users to ensure everything works correctly.

    How do I create a segment to target a specific group of people?

    You can build segments in your workspace based on data attributes or events. Go to the Segments page and define rules using information like user behavior or profile details. This lets you send highly targeted campaigns to the right audience.

    What is a workflow and how do I design one?

    A workflow is the automation process that defines when and how your messages are sent. You design it by choosing a trigger, such as a user action or event, and then building the sequence of messages and actions that follow.

    Can I send messages through channels other than email?

    Yes, the platform supports multiple channels. You can set up in-app messaging for your website or mobile app, as well as push notifications and SMS. Each channel has its own configuration steps within your workspace settings.

    How can I personalize the content of my messages?

    You personalize content using Liquid, a flexible templating language. Insert dynamic variables into your message body to display user-specific information, like a first name or product details, making each communication feel unique.

    Is there a way to test my campaigns before going live?

    Absolutely. You should always test your campaigns using test users. Add people to your workspace with specific attributes that match your segment criteria. This allows you to trigger the workflow and review the messages safely before launching to your entire audience.